About Ms Bettencourt

Ms Bettencourt is a Swedish built 25-foot trailerable trawler. Her hull was completed in 1971, No. 1117 of about 2500 built. The boat is named for my wife Dia, whose maiden name is Bettencourt.

This little vessel came to me as a gift in 2004. Before then she had been abandoned about 12 years on the Savannah River near Augusta, GA. I have repaired and refitted the boat extensively, and I have cruised her along the East coast of the US, from Cape Lookout, NC, to the Florida Keys. I dream of taking her to Havana some day.

This blog started in 2011 to chronicle the building of a hard top for the boat to replace leaky canvas. Since then the blog has become an Albin-25 boatkeeping and cruising journal.


Wednesday, February 29, 2012

Modulus of elasticity? You gotta be kidding!

I will reveal the morals of this story straightaway: Assumptions are dangerous. Willingness to change course is necessary. Humility is to be desired.

Please recall from the last post, that elegant set of rafters I built on the bench. Recall how nicely the new top curved over the rafters, when screwed down with the special fasteners I designed myself. And, remember the "item of faith" I cited: That the new top would retain its curvature after it was fiberglassed and removed from the strongback rafters.

Get all that out of your mind. It's gone. All gone. Poof! And that is good.

After that last post, Dan left a comment that changed everything. Thank goodness! I could have messed up big time. He wrote:

The modulus of elasticity (elastic modulus) for fiberglass is much different than for wood. In other words, the fiberglass-epoxy matrix will bend much easier than the plywood. In fiberglass boats it is the stringers and frames that give the hull it's stiffness. In the case of your top, the fiberglass-epoxy matrix provides protection against the elements of weather and provides very little to the structural integrity. 
 What does that mean for you? It means that what ever the plywood wants to do when it is "unhooked" from the strong-back it will do. The epoxy-fiberglass coating will do very little to make the roof stay in a curved condition.  
My suggestion: try a small test piece. Take a strip of plywood, hold it in a curved position, cover with epoxy and fiberglass, and release it. Let me know what happens. 

A follow-up exchange with Dan also established another likelihood: Not only would the top not hold its curve, but forces locked inside the structure by fiberglassing it while bent would be working in destructive directions when the top went flat. The fiberglass sheath and the wood would want to de-laminate.

I am convinced. But I used to work at a university, so I set up the suggested experiment. I took a five-foot strip of scrap top plywood and bent it between two chocks on the bench. I applied fiberglass fabric and epoxy. It looked like this:


I let it cure overnight, then trimmed off the excess fiberglass cloth.


Next, I applied another coat of epoxy; just enough to fill the weave of the cloth. Just as we are planning to do when we glass the whole top.


The photo at left shows what happened after tension was released this afternoon.

The test piece did not go completely flat immediately, but I am willing to bet that it will be near-horizontal by morning. There is no evidence of de-lamination, but that would probably take more time than has passed so far.


There's another piece of information you might pick up from the above photo. The new top, part of which is shown in the upper portion of this photo, is now flat. We removed the special fasteners and took the top off the strongback. The rafters are gone. The top has gone flat. I am patching the holes left by the fasteners now.

My friends Major and Paul are coming over in the morning and we are going to start fiberglassing. This project should begin to move pretty fast now. And, thanks to Dan, I think we will be moving in the right direction.

Lessons learned: Don't assume. Listen to friends. Experiment. Learn from mistakes.

And, please, please keep the comments coming.


Friday, February 24, 2012

Another Moment of Truth

An anxious time came and went yesterday as my friend Major and I moved the new top project into its next phase. At issue was whether the scarf-jointed structure I had built of 3/8-inch marine plywood, epoxy resin and PVC molding would bend -- or break.

The suspense began with assembly of a strongback on the bench. I had pre-fabricated the structure a few weeks ago and piled the pieces under the bench. We put it together with 3-inch deck screws in a half-hour or so.


The idea is to approximate the curvature of the supporting structure we built for the top on the boat last November and December. The strongback has five curved "rafters". These are screwed onto a box made of eight-foot 2x10s and 2x4s. There is one longitudinal stretcher to help hold it together. The whole thing is screwed to the tabletop.

Items of faith

There are two items of faith in play at this point. The first is that the top will bend (non destructively). The second is that the bent top will hold its curvature after the epoxy resin and fiberglass fabric coating  is cured and the fasteners are removed.

The first concern was resolved shortly after we brought the top to the strongback and started fastening it in place with my specially modified 1 5/8-inch drywall screws.

The top bent! No complaints from the materials. Nothing broke.

We used nylon "load binder" ratchet straps to ease the top curvature into conformation with the rafter curves.

In a trice, I sprang cat-like onto the top and began applying my special fasteners.

The ratchet straps were released one at a time as we completed screwing the top down to each rafter.


Here's one of the special fasteners. It is a standard  1 5/8-inch drywall screw with a snippet of nylon ice maker water tubing slipped over the last half-inch of threads before the head.

Very soon, we will be applying fiberglass fabric and resin to the top surface. The nylon collars on the screws will keep the screw heads above the  fabric and resin. The resin won't stick to the nylon, so the screws  and collars should be easy to remove after the top is glassed.

Yet to come --

I mentioned two items of faith at the start of this post. The second, not yet revealed, moment of truth will come when the glassed top has cured, and the screws have been removed. Will the top hold its shape? Stay tuned.

Meanwhile, here's what the top looked like at the end of  work yesterday.


Click to enlarge and you may be able to see the rows of fasteners in the top. I think they look like miniature versions of those electrodes sticking out the sides of Frankenstein's neck.

When removed, the fasteners will leave 26 holes in the fiberglass fabric, which I will patch before I paint the top.

Tomorrow, I will lay the fiberglass fabric out on top of the top so the fabric weave can relax and wrinkles can fall out. I think I will have to cut little slots in the fabric to slip over each screw head, but some other solution may come to me before I start on that part of the work.

Finally, please keep it up ... I really enjoy the conversations that can develop in the comments sections after these posts. I value your ideas and I will answer questions promptly.

Wednesday, February 22, 2012

Rope Yarn Sunday


Neat is good


There was a custom on a couple of naval vessels I served on, to take Wednesday afternoons off from the usual ship's routine--most often when at sea. This was called Rope Yarn Sunday for reasons I was never able to learn. In true naval fashion, this wasn't really an afternoon off. It was time for "make and mend;" a time to catch up on the little items that had been postponed; to fix stuff that was easily fixed; to renew lines, touch up paint, etc.

So here it is Wednesday afternoon and I am declaring this a good afternoon for such duties here. I have picked up and reorganized the tools that were scattered all over the place. I have swept out the sawdust. I have hauled away the scrap. I have inventoried materials and placed orders for needed stuff. All I have left to do this afternoon is to clean the band saw blade and report on the budget.

Budget?

Yes, there is a budget. The figure of $2,500 was deeply buried in the first post of this blog last year. That was my best estimate for the cost of this top project, as of Nov. 28, 2011. So how are we doing? Last night, after I placed an order for some monel staples at Amazon, the balance left in the hard top account was $30. An accountant would say this number is so small as to be not "material." I agree. Basically, the job is nearly done. The big expenses are already booked. And, we are still on budget.


Item                                                                 Budget             Actual
Marine plywood                                                     $380                 380
Epoxy, glass fabric                                                 340                 480
Scarfing tools                                                         280                  280
Lumber for bench                                                   155                 164
Fir lumber for framework                                          95                 218
Outside labor                                                          500                 580
Trim, fasteners, handrails, paint, contingencies    250                 368

Totals                                                               $2,500             $2,470


I hope this accounting is helpful, though please bear in mind that there are significant regional differences in materials costs. For example, fir lumber and marine plywood are probably a whole lot less expensive in the Pacific Northwest than they are in Georgia.

Meanwhile...


Dia and I rolled and tipped the second and final coat of un-thickened epoxy on the underside of the top yesterday afternoon. Next, we will flip it over and trim up the edges before starting to apply epoxy and fiberglass fabric to the top.


The resin coating made the top's underside about as slick as a dance floor. It is rather pretty.

The purpose of the epoxy coating is to encapsulate the plywood to prevent water intrusion which could lead to rot.

This surface will be painted, probably white, after the top is affixed to the boat.


And finally, a blog technical note... 

 I have adjusted the blog comments settings so that it should be a lot less hassle to post questions and comments. I sincerely welcome your suggestions, ideas, requests and questions. I will try to reply rapidly. Use the Comments section below to make a post or to read/participate in any conversations that may be going on.

Thanks for reading about this project.


Saturday, February 18, 2012

Dang! Grounded again!


Well, maybe not literally. But I just realized this winter project is very likely to disrupt the spring cruising schedule. There is too much to do.

My friend and fellow coastal pilot Major came over to help. (He is pictured in the dinghy above, following a dramatic plotting error a few years ago). We were talking yesterday about cruise plans when we realized that this project has us grounded. We are usually on the way to somewhere by late March every year. That's next month. We won't make that schedule this year. We have ruled out going topless.


Daunting tasks remain:

  • Finish application of fiberglass fabric tape to the underside top molding--now about 70% done.
  • Roll two coats of unthickened epoxy on the underside of the hard top.
  • Move the top off the table and build a strongback structure; then flip the top and bend it over the strongback.
  • Apply about 100 square feet of fiberglass fabric to the top, followed by multiple applications of unthickened epoxy to fill the glass fiber weave and fair the top surface.
  • Paint the whole thing--one coat of primer and two coats of epoxy topcoat.
  • Strip, cut to length, renew fasteners and varnish the 10-foot-long teak grab rails.

And, all of this has to happen before we can even attach the top to the boat. And the boat is not yet ready to receive its new top either.

It is time for some optimism. It is time to man up and soldier on.  I will work today on the boat.

The area over the windshield and around the sides of the pilothouse will become inaccessible after the top goes on. So I need to be wiring now.


We pulled a pair of wires for the windshield wiper and a two-conductor cable to provide for a mid-cabin overhead light.

These wires came up from the 12-volt panel in the head below through a very small channel near the windshield. The big white cable is to be poked up to daylight through a new hole.  This hole must be drilled very carefully, to avoid the tightly packed wires in the overhead channel. I got this done with surprising ease, using a screwdriver to hold the wires aside and a long drill bit.


Wiring for the light mast is also a job that must be done before the top goes on. The new top will sit down where the wires come out. I need to route them so I can poke the wires up through a pre-drilled hole in the top.
That white thing with the hole in it is a block I made out of PVC to serve as a solid base for the mast tabernacle. I decided this block was not wide enough. The new mast I am going to make will have a thicker base. So, back to the shop bench ...


...where I sliced the backer block in half to make a wider footprint. I realize now that the photo at right shows the tabernacle fitting placed on the backer blocks backwards, but I am sure you get the idea. Plenty of meaty PVC to screw into.

The backer blocks are now epoxied in place above the windshield. The wires will pass through a slot I routed in the port side block. The plywood top will sit on top of the blocks. The tabernacle fitting will be screwed down through the plywood and into the blocks.


I need to take some measurements and write them down now, so when the time comes I'll know where to drill the wire hole in the top, and where to place the tabernacle to screw it down.

Meanwhile, I think I'll spend the rest of the day sitting around with a chart book, thinking about cruising and waiting for epoxy to cure.


ELECTRICAL DETAILS: The wires for the windshield wiper are 14 gage, which is what the book says for a 12 volt run of about 10 feet to a wiper motor that will draw 3-5 amps. The two-conductor wire is 18 gage which is plenty big enough to handle a LED overhead light fixture. The three wires for the light mast are 20 gage--kind of small, but adequate for the LEDs in the steaming and anchor light fixture at the top of the mast.

Saturday, February 11, 2012

Overcome by tedium--almost

I am in a "Marching through Dixie" phase of the work -- doing a lot of absolutely necessary stuff that must be done well; but largely tasks that are boring as dirt.

There is little drama associated with this part of the project, save small triumphs over doubts of basic competency. For example, I have finally figured out how to build and apply a half-round molding around the underside perimeter of the hardtop.

The half-round border is important because it will allow a gentle roll of the fiberglass cloth material from the roof to the underside of the hardtop. It will provide some added strength. And, done right, it might also look good. The idea for this feature came, of course, from The Mothership of Albin hardtops--Hira Reid's Shatoosh, Albin 25 #1124.

Imagine the hardtop edge without the half-round. It would be sharp and stark.

The half-round also projects an image of thickness, substance and strength.

Ms. Bettencourt must have such a top.

So, just buy some half-round and do it, right?

Wrong!  I found some pine half-round molding and bought more than enough. Then I found out that the stuff wouldn't bend. I tried notching it on one side. Soaking it. Heating it. I had some ready to go in the dishwasher, but was denied access to that machine.

It began to appear that I would have to build a steam box and associated paraphernalia to get the molding soft enough to go around the new top's corners. Then I remembered the PVC moldings for sale at  the home center.


No PVC half-round was available, but they had plenty of half-inch quarter-round PVC molding in 8-foot lengths.

It seems to me that  all I need to do is put two pieces of quarter-round together and, behold--half-round, as shown at far left.

The final molding doesn't have to be pretty because it will be covered with fiberglass fabric and painted.

The sticks in the foreground of the photo above, by the way, are artifacts of one of my failed attempts to bend the the wooden half-round.

The most complicated parts are the corners. That's where I started.  The PVC material is fairly easy to work, with the judicious use of of a heat gun. I found that I could heat, bend and tack down the quarter-round pieces face-to-face with relative ease.


The corner curves held their shape after the heated portions cooled, which was a relief.

I formed the two-piece assemblies on the corners of the hardtop with finish nails, then lifted them off the wood without completely pulling the nails from the molding.

This made it possible to set the corner pieces aside while I prepared the wood surfaces with epoxy glue. Then it was easy to set them back and tack them down in the same locations.

I glued the forward corners first and let the epoxy glue cure overnight before pulling the nails. The PVC glue-down feels like a mighty bond--seemingly one with the wood. I finished the remaining corners today, and I expect to complete the entire perimeter this weekend.


This is the aft end of the underside of new hardtop with the PVC molding  freshly glued and tacked in place.

Notice that  I have formed a filet of thickened epoxy glue along the inside of the molding. This is to further ease a smooth transition of fiberglass fabric over the molding and onto the underside wood.

 Installing the remainder of the molding should go fairly rapidly, since there are no more sharp turns. After the glue has cured, I'll pull the nails and smooth everything up with a detail sander.

Next, an even more painstaking and tedious task begins: Covering the hardtop edges and the PVC molding with a layer of 4-inch fiberglass tape.

SOME TECHNICAL DETAILS:  I am using MarinEpoxy with a medium speed catalyst. I applied un-thickened epoxy to the wood and allowed about 5 minutes for it to absorb. Then I mixed wood flour into the epoxy left in the pot until I had a pancake batter consistency. I brushed this mixture over the first coat of epoxy, then tacked the molding down. Then I added some colloidal silica to further thicken the glue in the pot. I used this very thick mixture to form the filets around the inside of the molding and to fill a few gaps. The epoxy glue gave me 20-30 minutes of working time at a temperature of about 60F in the unheated garage.


Tuesday, January 31, 2012

Moving a little faster

It seems like the pace has really picked up in the last couple of days. I have gone from a cardboard pattern, to completing the last seam in the marine plywood, to the finished hardtop cutout.

Here's Buffet Wesley Bettencourt following a careful inspection of the newly-joined 8x12' sheet of marine plywood. If you click to enlarge this picture you might be able to see the lighter-colored strip of plywood running across the large sheet. This is how I clamped the completed scarf joints after glue-up. Wax paper goes across the table under the joint. Another strip of wax paper goes over the joint, under the clamping board. Then the clamping board gets screwed down with drywall screws every 6 inches or so.


The screws come out and the clamping board comes off after about 24 hours. Then I placed the cardboard pattern on the large plywood sheet, aligning the cardboard's straight edge with a center line marked on the plywood.


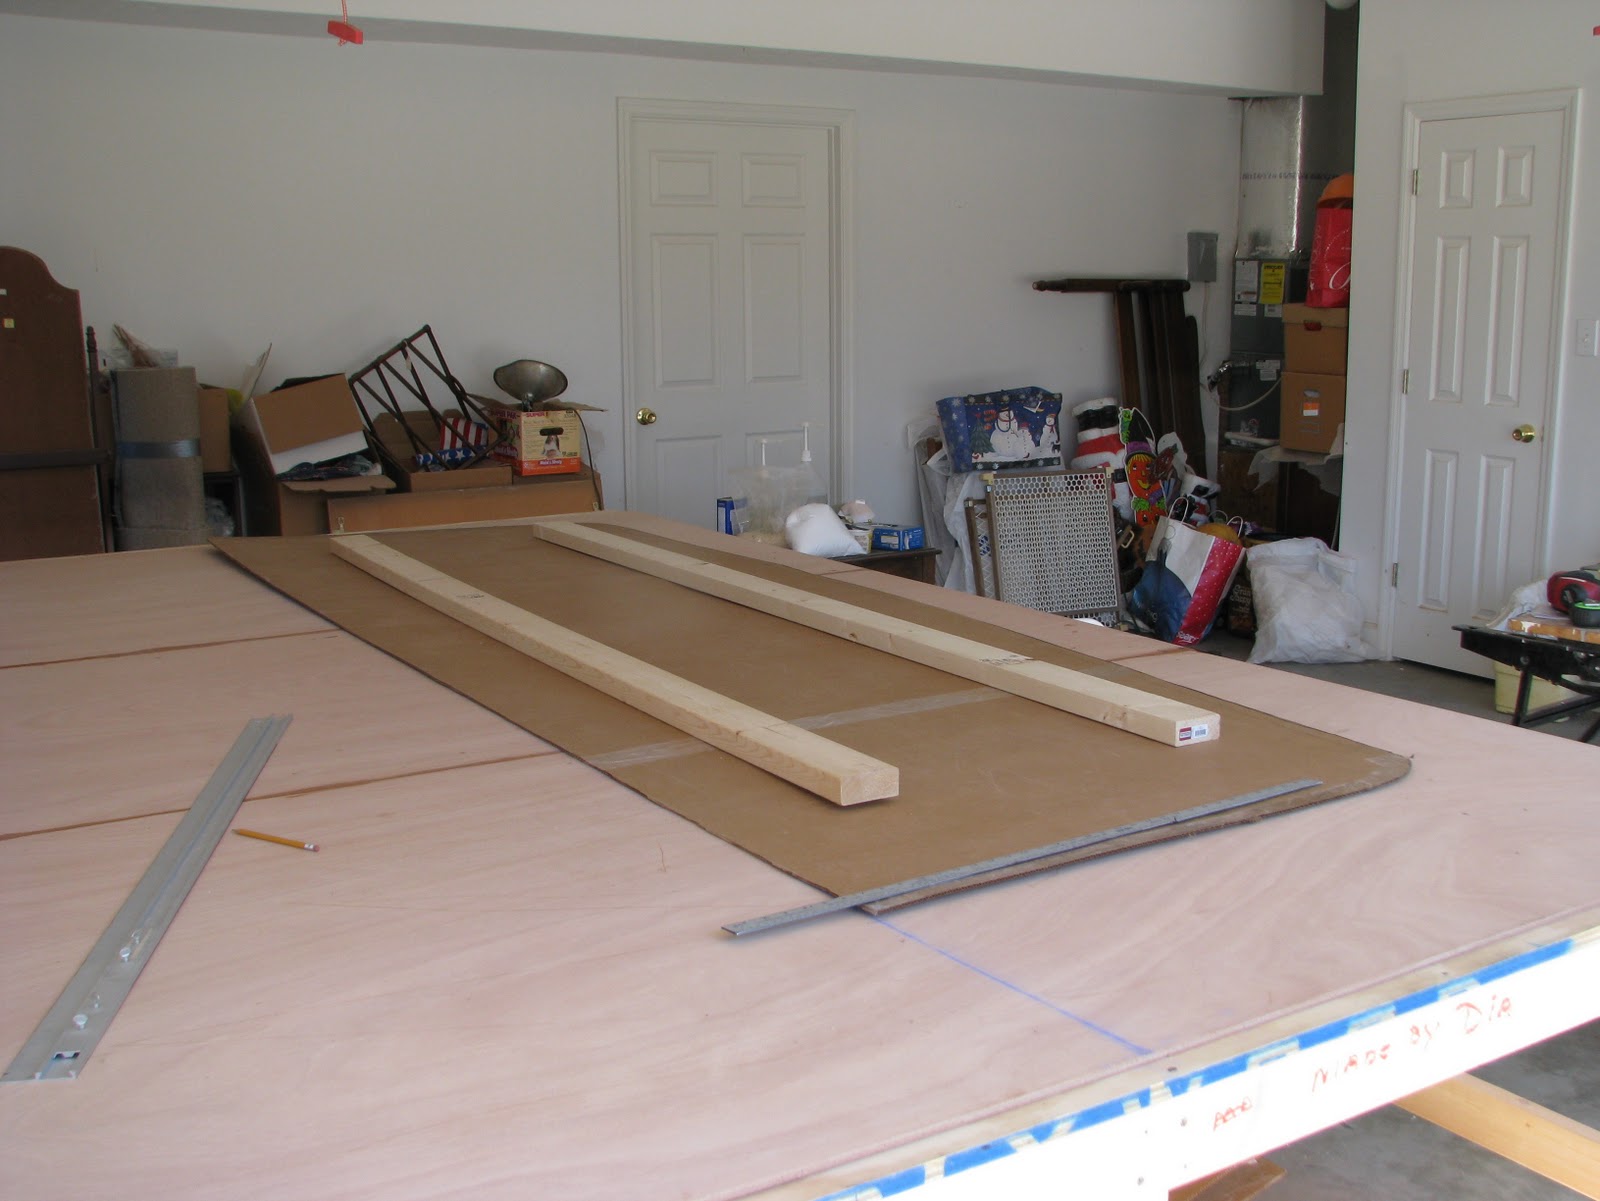
Next, I pencil around the pattern. This photo shows the pattern placed to outline the port side of the hard top, as seen from aft.


Then I flip the cardboard over to outline the starboard side. The 2x4s on the cardboard in the photo to the left are there to help hold the pattern flat while I trace around it.
Some effort was required working up the courage to make the first saw cut into this pristine 8x12' piece of plywood. This piece of wood has consumed a lot of my life in recent weeks.

I started with a few tentative edge cuts... 


...then pressed on, carefully, around my pencil line, making a lot of sawdust, all the way back around to where I started.


That must be sawdust in my beard--I couldn't be going gray.

The resulting plywood cutout is still too unwieldy for me to handle alone. So a quick call to my friend Major results in the additional manpower needed to get the top off the bench and out into daylight.


We estimated that the finished cutout weighs between 60 and 80 pounds. Its final dimensions are 9' 11 1/2" long at the centerline and 7' 1 1/8" wide at its widest point.
The dark stripeing across the plywood is epoxy glue that squeezed out of the joints that made three sheets of plywood into one. I will sand these joints smooth.

Ultimately, the whole top will be covered with epoxy and fiberglass cloth, then painted.

It will still be some time before we'll be looking at Albin-25 #1117 under this top, but I am very encouraged now by the speed at which this really complicated project seems to be moving along.


Saturday, January 21, 2012

Discovering cardboard

Building a hard top for this boat has been very much on my mind for at least the last three years. As a typically trained busines school graduate, I thought out detailed processes for each major phase of the work. In most cases, this is a good way to think about complicated projects.

Sometimes, however, it is possible to rely too much on process analysis and to paint oneself into a corner. This is how I came to waste a week and countless auto miles looking for thin plywood. I had planned on using 1/8"  Luan plywood for the new top pattern. One-eighth inch Luan plywood is nowhere to be found.

Eureka!

Then I remembered the big cardboard carton the marine plywood came in. So, today I have learned a lesson about being more flexible. And the project is on the move again.

Cardboard is great stuff for big patterns. It can be easily worked with a box cutter. Mistakes can be fixed with package tape.

How we made the pattern

We tacked a big piece of cardboard on the framework previously built on the boat. Then I followed around the outside of the framework with the point of a pencil compass. As the compass point tracked the framework perimeter, the pencil transfered the structure's curves to the underside the cardboard. The overhang widths on the front, sides and back of the top were penciled onto the cardboard by adjusting the radius on the compass for the desired overhang dimensions. Real boat carpenters call this technique "spiling." Spiling can be tricky, but accurate results can be achieved with practice and care.

So here I am, spiling away. Please note that I have discovered another important fact about making big patterns:


It is not necessary to pattern the whole structure. I need only make a half-pattern. When it comes time to transfer the pattern to the plywood, I will pencil around my half pattern, then flip it over to trace the opposite perimeter.


Here's what the half-pattern looked like after I had cut along my compass tracks. Dia, who is 5'  6", provides a sense of the cardboard cut-out's size.
At this point, the pattern will produce a top that is 10' 2" long and 7' 1" wide.


The pattern, tacked back on the framework for a test fit, suggests how the final product will likely look. The "eyebrow" overhang in the front will be 8". We first planned for a 5" overhang in the back, but after looking at the pattern in place, we increased the rear overhang to match the front--8".


The overhang along the sides of the top was set at 5 1/2". We wanted to extend the side edges far enough so that rain running off the top wouldn't flow inside the cabin coaming, but not so far as to hamper cabin access and movement around the side decks.
    
  
I draped a weighted piece of string over the pattern's edge to simulate a drip line. You may be able to see it better if you click this image to enlarge it. I measured about a 2" clearance from the drip line to the coaming edge. That may not be enough. I might widen the the final top width to increase this offset.


Rain and sawdust


Rain is expected here over the next few days. The pattern will be moved to a dry corner of the garage for a time.
Next, I will start the work of joining three 4x8 sheets of marine plywood into one big sheet from which the final top will emerge.